SharePoint Selection
ReplaceMagic supports native integration with SharePoint (on-premise and online version). This means that if you click on:
you will come to form where you can add SharePoint site and select where processing should run (site, document library or some folder). Of course, you can select multiple locations for document processing: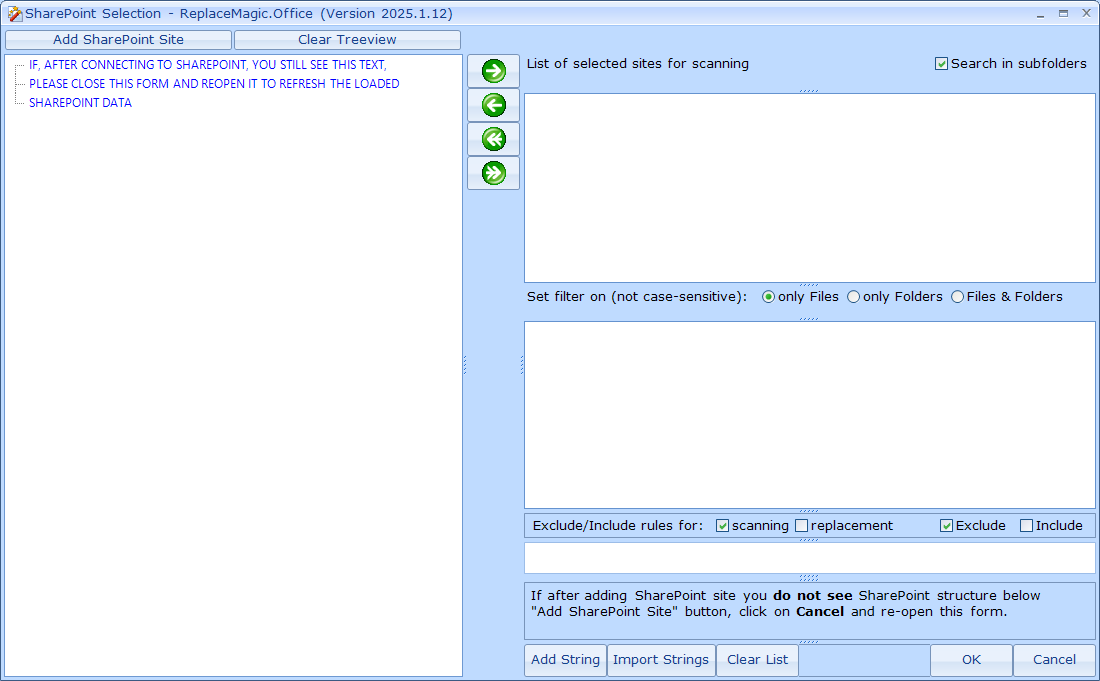
Like written above you'll have to logon to your SharePoint site. This can be on-premise or online version of SharePoint.

ReplaceMagic supports following authentication models:


In case that you chose to use Claims you'll see following form:

Remark: Claims (ADFS) and ADFS SSO are in beta version. In case of any issues please contact ReplaceMagic team over support@replacemagic.com
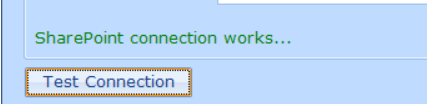
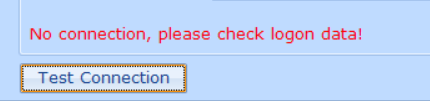
After providing needed data (like SharePoint URL, username, password and authentication mode)

you can either test connection (like below)

Case when connection can be established:
Case when connection, for some reason, does not work (in that can please check entered data and ensure that URL, username and password are correct and that you selected appropriate authentication mode):
In case that option Suppress Warnings (under Configuration) is not set you will see additional popup with error description returned from SharePoint:
As password is stored behind * to check what you entered just move mouse over button "Show password" and it will change caption to text that you entered as a password.

ReplaceMagic will keep last 10 successful connections per Windows user. To use some of used connections just click on Connection History drop-down.

If you want you can also delete some of saved connections by selecting connection and then pressing delete button next to selections dropdown.
In addition, you have possibility also to set proxy settings (if needed):


As Microsoft is protected workload sent to SharePoint platform (you might experienced SharePoint throttling) we introduced possibility that you enter multiple users which will be used during document processing.
To do that, before you start to enter user credentials click on "Use multiple users" (1) and then when you enter user data (2) click on "Add more users" (3). In case that connection works (you'll be notified) ReplaceMagic will store user data in "Additional SharePoint users" table. Double click on user data in list of all connections will remove that connection from the list. Authentication modes can be different as long as they are allowed to be used by your SharePoint configuration (in screenshot about you can see SharePoint.Online and Web Logon authentication used by same user) but it is our strong recommendation to use the same authentication mode to avoid potential differences between modes (for example, Web Logon does not support changes on hyperlink in list item fields).
When you entered all user data just click on "Connect" (4) and ReplaceMagic will use last entered used to connect to the SharePoint.

Remark: Multiple users for SharePoint authentication are supported only if authentication mode of all users is the same (for example, all users are created with WebLogon or SharePoint.Online authentication)
Later, during processing, ReplaceMagic will, for each document, use next SharePoint user credentials (round-robin mode) which will "split" workload across entered users with target to reduce risk of throttling as for SharePoint it will not look like that there is only one user processing all documents but there are multiple users.
Side effect: In case that SharePoint decides to throttle or even block processing might happen that all users are affected. Of course, if you use only one user then only that user will be affected.
Remark: all entered user connections will need to have same SharePoint URL (same SharePoint location). Also be careful that all users are having same permissions to avoid that some documents are processed and some not due to missing authorizations.
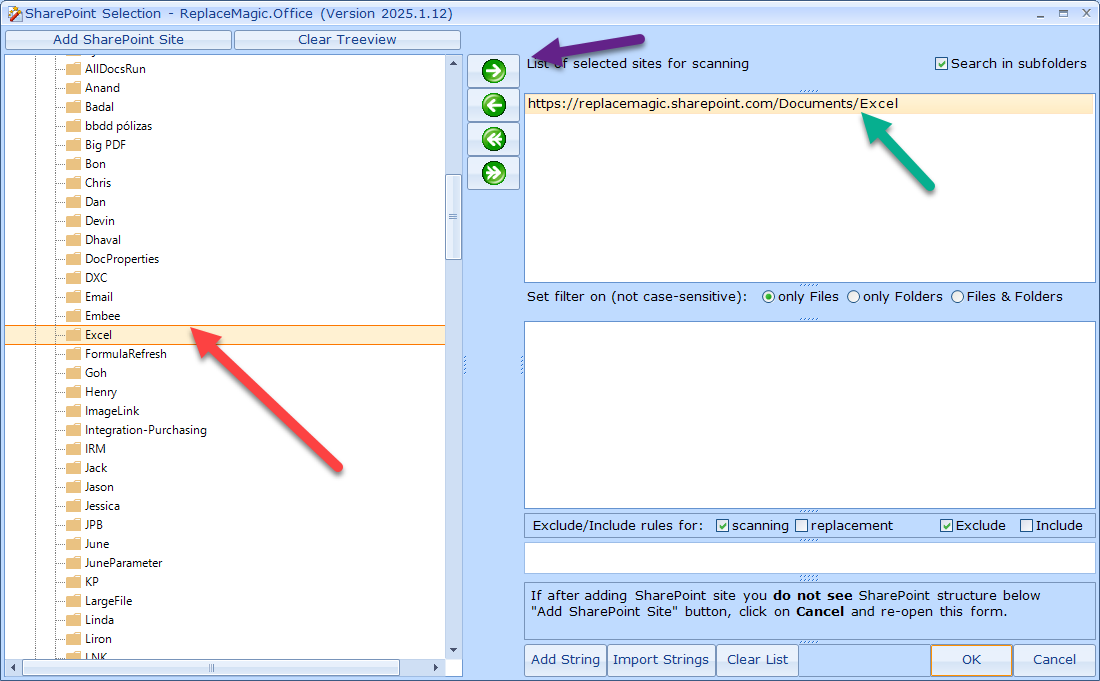
Double-click on some of SharePoint nodes will open that node and show sub-nodes. During load of sub-node data you will see in upper right corner of this form progress bar informing you about position of SharePoint data load:


If you want to select some of nodes for document processing just click on that node and then click on some of arrows to move node to the list of selected sites for scanning:
By clicking on double-arrow to the right  all opened shown nodes will be moved to the list of selected sites for scanning.
In case that you want to remove some of selected nodes just double-click on that node or press  . If you press
  all nodes will be removed.
Additional options here are:
- "Search in subfolders" => which will instruct ReplaceMagic to scan documents also in sub folders / sub nodes of selected node and
- You'll have option to filter what should be selected for further processing by specifying words that should influence what ReplaceMagic will exclude/include.
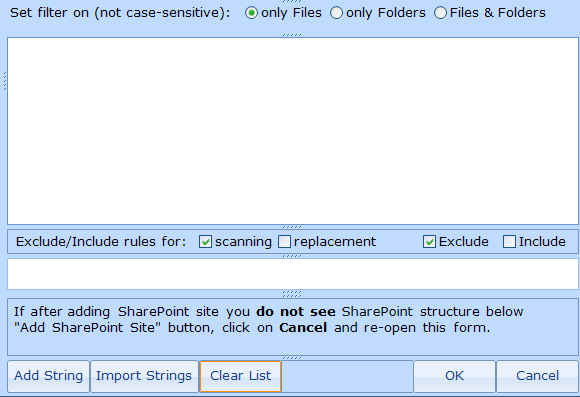
Process is:
- Add word(s) which should be used during filtering. Of course, you can have multiple words
- Select if entered words will be checked against folder name, file name or file and folder name
- Select if filtering should be applied during scanning or replacement or both
- Set if you want that we exclude or include documents according to the entered words. In case of exclude, documents containing words are excluded and in case of include all documents not containing words are excluded
- You have to set configuration prior to scanning or replacement run and it is immediately active. If there are no entered words, other parameters are ignored.
- This configuration will be also exported if silent run XML is prepared.
In case that you prepared list of strings for filtering, you can import it over Import Strings. Each string has to be in separate row.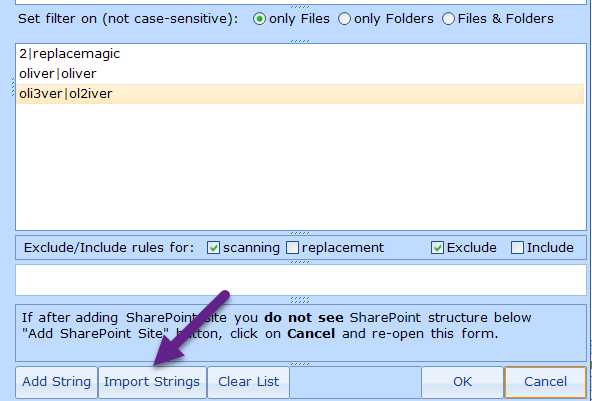
After you are happy with selection just click on OK and that will return you to main ReplaceMagic form where you can see selected SharePoint node(s):

Of course, you can select multiple number of locations for scanning.
To start document scan just click on button "Scan documents" similar to what you need to do when scanning documents on other supported locations.
Scanning will look like:

Remark: in case of issues to connect to SharePoint.Online please check MFA section here.