How to Select SharePoint Files for Broken Link Scanning
ReplaceMagic connects natively to SharePoint Online and on-premises — no drive mapping required. This guide walks through selecting your SharePoint site, authenticating, and choosing the document libraries to scan.
Download ReplaceMagic SharePoint Authentication Guide
Step 1 — Open the SharePoint Selection
In ReplaceMagic, go to the Scan Documents tab and click the SharePoint icon in the location selection area (bottom-right corner of the tab). This opens the SharePoint connection dialog.

Step 2 — Enter Your SharePoint Site URL
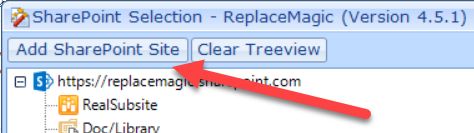
In the SharePoint selection form, click Add SharePoint Site:
- SharePoint Online: enter the full site URL, for example
https://yourcompany.sharepoint.com/sites/YourSite - SharePoint on-premises: enter the full server URL, for example
http://sharepoint.yourcompany.com
You can add multiple SharePoint sites to the list and scan all of them in a single run.
Step 3 — Authenticate
A new form appears where you enter the site URL, user credentials and authentication mode:
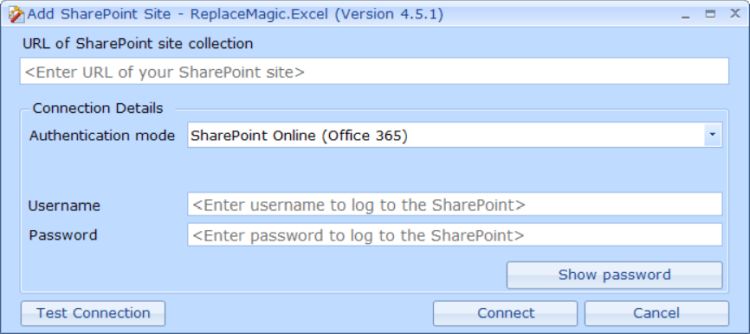
Choose the authentication method that matches your environment:
- SharePoint Online (Office 365): standard Microsoft 365 credentials — username and password
- Windows Authentication: for on-premises SharePoint with Active Directory integration
- Multi-Factor Authentication: use an app password; see the MFA guide for setup steps
- App-Only Authentication: for service accounts and automated runs; see the App-Only Authentication guide
- Legacy Auth Mode: for older on-premises environments where modern authentication is not available
Click Test Connection to validate your credentials before proceeding, then click Connect.
Full details on each authentication mode are available in the SharePoint Authentication guide.
Step 4 — Select Document Libraries
After a successful connection, the SharePoint selection form shows a tree view of your site structure — site collections, sites, and document libraries:

Double-click any node to expand it and load its children. Tick the checkboxes next to the document libraries or folders you want to include in the scan. You can select multiple libraries across different sites — all selected locations are scanned in the same run. You can also set exclusion filters to skip specific libraries or folders by keyword.
When your selection is complete, click OK. ReplaceMagic will use these locations when you start the scan.
What ReplaceMagic Can Scan on SharePoint
- Document libraries containing Word, Excel, PowerPoint, Visio, Project, PDF and plain-text files
- SharePoint Wiki pages and Canvas pages (ASPX content)
- List attachments (configurable)
Note: SharePoint list items (non-document content) and discussion boards have some limitations — contact us for details.
SharePoint-Specific Scan Tips
- Start with 3–5 parallel processing threads to avoid SharePoint throttling. Adjust the thread count in Configuration → Configuration tab.
- Enable Decrease workload during SharePoint Throttling in Configuration as a safety net for large libraries.
- For very large libraries (100,000+ documents), scan in site-by-site batches to keep each run manageable.
- Preserving the last-modified date and editor during a replacement run requires the ReplaceMagic account to have Site Administrator rights on SharePoint — this is a SharePoint API limitation.
- If documents are checked out by other users, enable Enforce check-in in Configuration → SharePoint Configuration so ReplaceMagic can process those documents. A check-in comment is added automatically.
Download ReplaceMagic SharePoint Authentication Guide
In case of any questions please do not hesitate to contact us.


